What to know
JMCloud is a VPN-based solution that allows to remotely access HMI and network devices connected to JMCloud Server through an internet connection.
This FAQ explains the basics to setup the Cloud service on eXware device.
Introduction
Following requirements needs to be satisfied to follow this FAQ:
- eXware device,
- JMobile Suite (Download here),
- JMCloud Connect software (Download here),
- a Superuser account for JMCloud Connect (Learn how-to here).
Network diagram below explain the network configuration we are going to setup on JMCloud:
Steps to do:
- Creation of gateway/endpoints with JMCloud Connect
- Cloud service setup on exWare
- Connection to gateway/endpoints with JMCloud Connect
1. Creation of gateway/endpoints with JMCloud Connect
Launch the JMCloud Connect software to get access to the JMCloud server,
in the Login page enter Username and Password, then click on the [SIGN IN] button.
Once connected select the DEVICES tab, then click on "Add Gateway" to add a new gateway device.
In this case the Gateway is the eXware.
Into the Gateway definition interface define:
- Name: must be unique in users, gateways and endpoints
- Organization: select the organization from the combo-box
- Password: must be at least 8 charaters and contain at least one non-alphanumeric character
- Serial number: this must be serial number of eXware.
NOTE: a valid serial number is required to use JMCloud. Any gateway with no serial number will not be accessible
These settings will define the log-in credentials to be set into the HMI Cloud Enabler on HMI. A description may be added.
In this example the credentials are:
- Username: HMI1@demo
- Password: hmi1123$
It's now necessary to define the HMI and PLC Endpoints behind eXware.
Select the Endpoints tab, and click on [Add row] button:
and fill the second row to set the HMI configuration:
- a Name for the HMI endpoint,
- the HMI IP Address. In this example HMI have IP 172.16.10.10,
- a description, optional.
A third Endpoint for the PLC need to be added by clicking on [Add row] button again, and filling the row with:
- a Name for the PLC endpoint,
- the PLC IP Address. In our example PLC have IP 172.16.10.11,
- a description, optional.
To save changes, click on the [Validate] button.
If operation is successfully completed the system will show a "Succesfully validated." message.
Click then on [Add] button to confirm and save changes to the new Gateway.
2. Cloud service setup on eXware
eXware device have 2 ethernet ports:
- WAN: internet access through customer's LAN network or DSL/3G Modem.
- LAN: machine local network.
Both ethernet ports (LAN and WAN) are configured to receive an IP Address from DHCP server.
If a DHCP Server is not available, they will auto assign an IP Address into range 169.254.X.X.
The IP Address can be found by using JMobile Studio selecting "Run > Manage Target".
From the Target drop-down list identify the eXware that can be recognized in the list as ROUTER.
In case more devices are connected into the network the correct one can be recognized by the last 4 digit of MAC-ID (printed on the ethernet interface label).
In this example the last 4 digits of the MAC-ID are 678F so the module could be recognized among the 2 modules present in the network.
Once the IP address of the eXware is known, it is possible to connect using any web browser to the eXware System Setting web page.
Into browser's address bar, type the URL: https://{ip_address}/machine_config
Some browser may report a security warning, then the page can be added to the trusted sites to allow the connection.
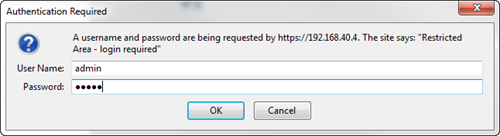
Once the connection is estabilished the system will ask for an User Name and Password to get access to the Web interface, defaults are:
- Username: admin
- Password: admin
Then the eXware web interface will be displayed:
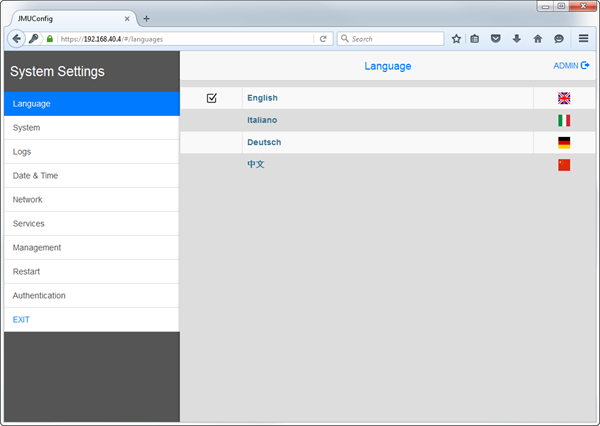
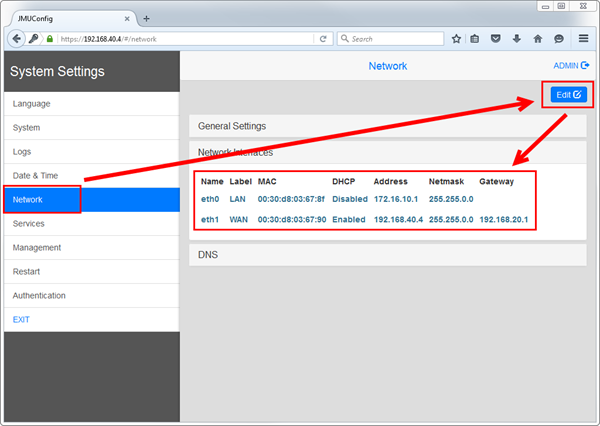
It is now possible to modify, if required, the Network settings of the eXware.
To do this, click the Network item, then select the [Edit] button.
In this example the eXware is configured with following settings:
- eth0 - LAN: 172.16.10.1
- eth1 - WAN: dynamic IP assigned by DHCP server.
To enable and setup the JMCloud connection:
- Select the Services item,
- Enable the Cloud Service by acting on the switch,
- Type Username and Password into Cloud Service settings and select [Save]
NOTE: these credentials are the ones previously defined for this Gateway with JMCloud Connect

Once confirmed if the connection operation is succesfull a message is given from the system, and the State voice will be updated accordingly.
3. Connection to gateway/enpoints with JMCloud Connect
Once the operator panel has been connected to the JMCloud server, from JMCloud Connect software it is possible to monitor the Endpoints defined.
Into CONNECTIONS tab will be reported Gateway and its Endpoints with proper IP Address and Status.
To establish the VPN tunnel with the HMI, from Actions select the Connect to endpoint command from the apposite drop-down box or click on the symbol.
If the connection is correctly established the status will change into Online-Connected.
To disconnect the Endpoint click on the icon from the Actions column.
Optional: use Real IP instead of Virtual IP
When an Endpoint is connected to the JMCloud server, by default gets a Virtual IP address.
In some cases it may be necessary for the Endpoints to maintain the real IP used into the local network also when reached trough the VPN.
To allow the use of real IP also in VPN the "Do not translate real IPs into virtual IPs (1:1 NAT)" option must be configured when the Endpoint is created.
When this option is selected the real IP of the operator panel and all other Endpoints must be specified into the configuration table as shown in the image below.