What to know
Designer environments allow the creation of customized UniOP fonts that can be used for example to have character sets for languages that does not use standard western ASCII tables.
To be used these customized fonts must be previously installed in Designer using the Font Editor tool.
What to do
- Copy the customized font file into the Designer installation folder.
Typical path is:
For 32 bit operating systems C:\Program Files\Exor\Designer 6
For 64 bit operating systems C:\Program Files (x86)\Exor\Designer 6
- Open (any) or create a new Designer project, then select TOOLS > FONT EDITOR
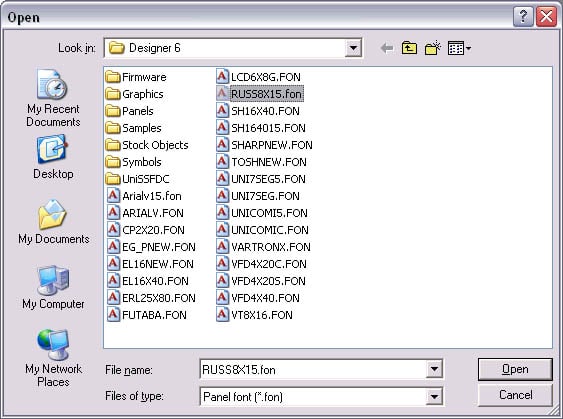
- Select the font file to be installed, then confirm with OPEN.
- Select FILE > INSTALL/VIEW INSTALLED FONTS
- Choose the correct Display Type from the list (IMAGE 1).
To know wich display type corresponds to the operator panel in use please refer to PROJECT > PANEL SETUP in Designer (IMAGE 2).
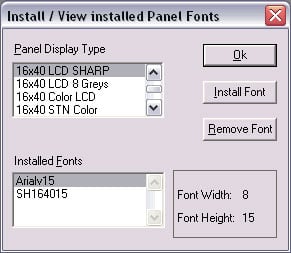
IMAGE 1
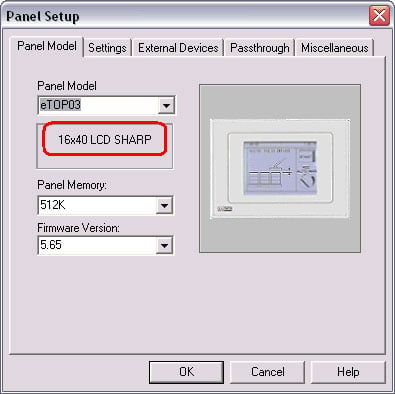
IMAGE 2
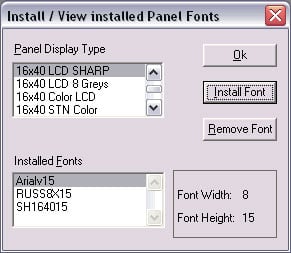
- Click on INSTALL FONT to install the selected font. The following dialog will appear

- Confirm with YES, the font file is added to the selected display type
Confirm again with OK to complete the installation procedure, Font Editor can be now closed.
Restart Designer to make sure font is properly displayed in the fonts list, new font installed can be selected by pressing on the ![]() icon in Designer.
icon in Designer.
Applies to
Customized UniOP fonts can be used with all the panel models with graphical display


