This guide shows how to configure network interfaces and provide Cloud credentials in EXOR HMIs based on Linux operative system (eX700, eXware, eSMART series).
Use the file “autoexec.sh” provided by EXOR and edit it using the following guide lines.
Network settings
Open “autexec.sh” file with a text editor.
In Network configuration section, set IP data for each eth interface, as shown below.
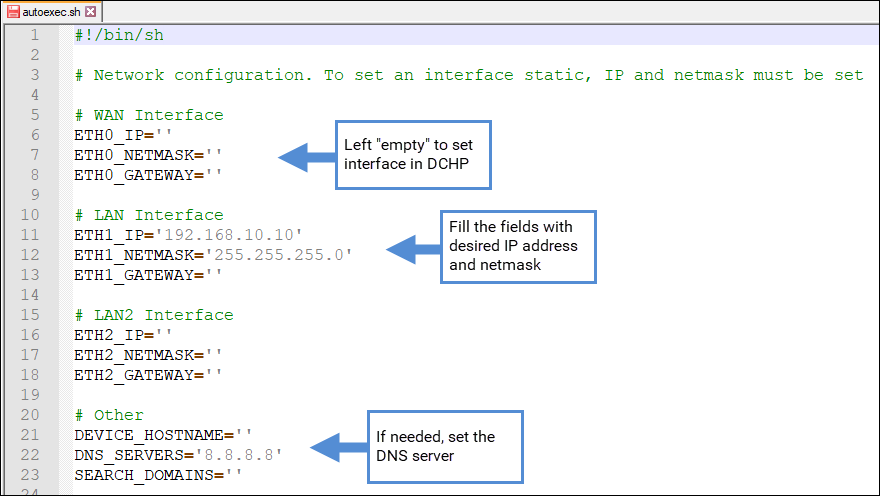
Note: WAN, LAN and LAN2 are referring respectively to eth0, eth1 and eth2.
Mobile Network Settings (PLCM09)
Open “autexec.sh” file with a text editor.
In Mobile/PPP section, set APN, PIN, authentication type (if required), as shown below.

Cloud credentials
Method 1: modify autoexec.sh file
Open “autexec.sh” file with a text editor.
In Cloud Configuration section, set Cloud username and password that have been created in Corvina Cloud, as shown in the below figure.

Method 2: download txt file from Cloud
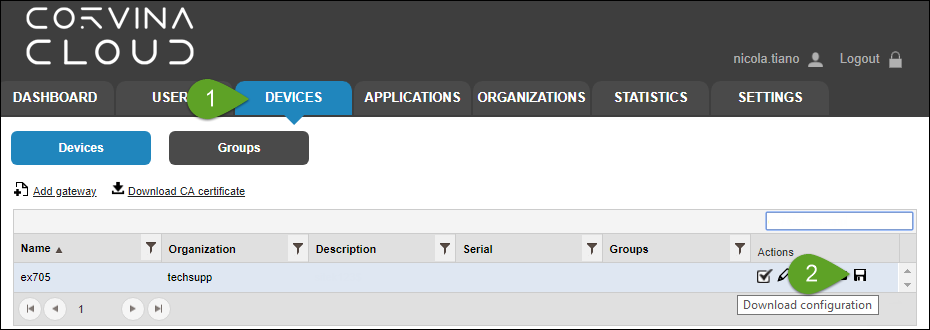
Go in Corvina Cloud web portal http://corvinacloud.com
Locate the device you want to give provisioning via USB.
Click on save button to download a text file which contains credentials.
By placing this file in a USB stick together with autoexec.sh file, the script will be capable to read credentials from text file and applying them to HMI in which USB stick is plugged.
Apply configuration
Copy “autexec.sh” file in a USB stick (and eventually also the text file for Cloud provisioning, if method 2 is used).
Insert the USB stick in the HMI. Configuration will be applied automatically.
End of procedure is signaled by three acoustic signals (beep). After such signals remove the USB stick and reboot the HMI.


